Creating and Deleting Email Forwards
Table of Contents
- Creating an email forward
- Creating a catch-all email forward
- Viewing your email forwards
- Editing an email forward
- Deleting an email forward
- Best practices
- Have more questions?
This article provides step-by-step instructions for creating, editing, and deleting email forwarding rules in DNSimple. For a visual guide to the email forwarding interface, see Email Forwarding Management in DNSimple.
Creating an email forward
You can create email forwards from either the domain’s Email Forwarding page or directly from the Dashboard.
Adding an email forward from the domain page
Add an email forward from the domain page
- Use the account switcher at the top of the page to select the appropriate account.
- In your list, click the name of the domain where you want to create an email forward.
- Click the tab on the left side.
- Click or the button.
- Enter the email forward details:
-
From: Enter the local part (the part before the @) of the email address you want to forward from (e.g.,
helloforhello@yourdomain.com). Do not include the domain name. -
To: Enter the full email address where you want emails to be forwarded (e.g.,
yourname@gmail.com).
-
From: Enter the local part (the part before the @) of the email address you want to forward from (e.g.,
- Click .

Adding an email forward from the dashboard
Add an email forward from the dashboard
- If you have more than one account, select the relevant one from the account switcher at the top-right corner of the screen.
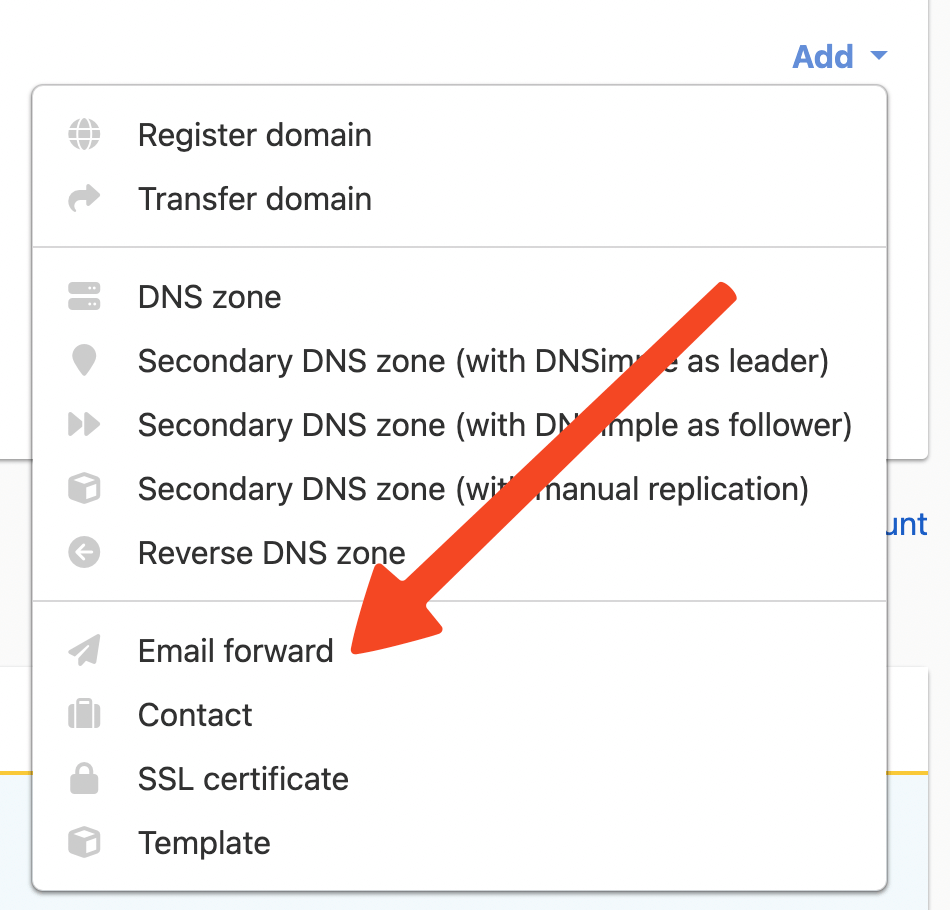
- Click from the Dashboard, and choose from the provided options.
- Select the domain (zone) to apply the forward to in the field. Only zones resolving through DNSimple will be included in the list.
- Enter the local part in the field (e.g.,
hello). - Enter the full destination email address in the field.
- Click .
Creating a catch-all email forward
A catch-all email forward forwards emails sent to any address at your domain that does not have a specific forwarding rule.
To create a catch-all address, follow the instructions to create an email forward. In the email forward form, select the option. Alternatively, you can enter the following wildcard expression in the field:
(.*)
The expression is represented as a period followed by an asterisk within parentheses. The parentheses are required. The UI also supports the format .* (without parentheses) for backward compatibility, but (.*) is the recommended format.
[!NOTE]
When you have a catch-all email forward, it only applies to emails sent to addresses that do not already have a specific email forward set up. If an email is sent to an address that has a matching email forward, only that email forward will handle it; the catch-all will not apply. This ensures each email is forwarded just once, avoiding duplicates and helping protect your privacy.
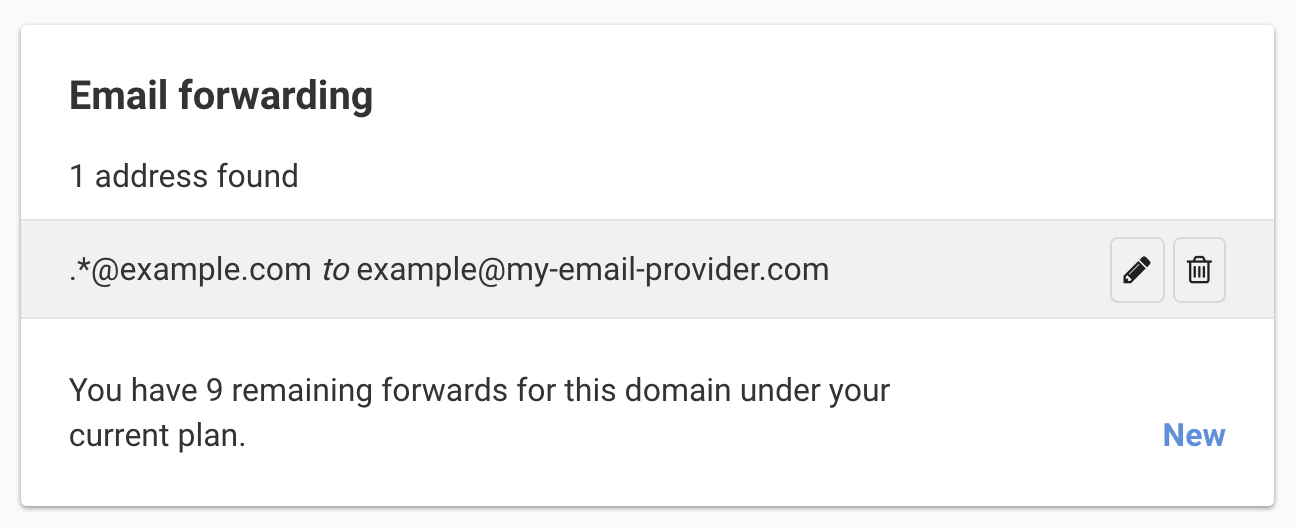
Viewing your email forwards
To view all email forwards for a domain:
- Navigate to the domain’s tab.
- All configured email forwards are listed in the Current Email Forwards section.
- Each forward displays:
- The source address (From)
- The destination address (To)
- Options to edit or delete the forward
For a visual guide to the email forwarding interface, see Email Forwarding Management in DNSimple.
Editing an email forward
Edit an existing email forward
- Navigate to the domain’s tab.
- Find the email forward you want to edit in the section.
- Click (the pencil icon).
- Modify the or fields as needed.
- Click to apply the changes.
Deleting an email forward
Delete an email forward
- Navigate to the domain’s tab.
- Locate the email forwarding configuration that you want to delete under the Current Email Forwards section.
- Click (the trash can icon).
- Confirm the deletion when prompted.
The email forward will be deleted immediately, and you will no longer receive emails through this configuration.
[!WARNING]
Deleting an email forward is permanent. Once deleted, emails sent to that address will bounce unless you create a new forward or set up email hosting.
Best practices
Use descriptive addresses: Create email forwards with clear, descriptive names (e.g., contact@yourdomain.com, support@yourdomain.com) to make it easier to identify the purpose of each forward.
Organize by function: Consider forwarding different addresses to different destinations based on their purpose (e.g., sales@yourdomain.com to your sales team, support@yourdomain.com to your support team).
Monitor catch-all forwards: If you use a catch-all forward, monitor your destination inbox for spam or unwanted emails, as catch-all forwards can receive emails sent to misspelled or random addresses.
Test after changes: After creating, editing, or deleting email forwards, test them by sending a test email to ensure everything is working as expected.
Have more questions?
If you have additional questions or need any assistance with managing email forwards, just contact support, and we’ll be happy to help.